Friday, December 23, 2011

Melting Ice with Salt

The origin for this activity was one of those classic questions that kids come up with, "Momma, why do they put ice on the road in the winter?" The follow up question that my older daughter came up with was, "Why do they use salt, though?  Couldn't they use sugar?"  For those of you lucky enough to live in a warmer climate where that isn't a question in your household, a similar one might be, "Why do you put salt in the pasta water?"  (I'll describe how you can do an experiment with second question in the Extensions section below.) 

Materials Needed:
  • 3 small plastic cups
  • crushed ice or ice cubes
  • measuring cups
  • spoon
  • salt
  • sugar
You could this activity a variety of ways depending on what type of ice you have available.  If you only have cubes, the best way would probably be to have your child count out the same number of ice cubes for each cup.  For crushed ice, you could either do a volume measurement (using the measuring cups) or, if you have a kitchen scale, you could measure out the same mass/weight of ice for each cup.

Process and Pictures:
Measure out an equal amount of ice for each of the cups, either by number of cubes, volume of crushed ice using a measuring cup or mass of crushed ice using a kitchen scale.  We used 1/2 cup for each of our cups but use what works for your cups.


Add about 1/4 cup of salt to one of the cups, 1/4 cup of sugar to another cup and don't add anything to the third cup.  Ask your child to predict which of the cups will melt the fastest.


Use the spoon to stir each of the cups.  Make sure to rinse the spoon between cups so that you are not contaminating the ice with salt or sugar from another cup.  Or use two different spoons.


Wait - the hardest part for the little ones.  If you are using science journals, then this would be a good time for your child to draw the experimental set-up in their journal.  Record how long it takes for each of the cups to melt.  This takes a while (1-2 hours +) so you will have to go do some other things and come back and check every 15 minutes or so.

From L to R: plain ice, ice with table salt, ice with sugar

Revisit the prediction your child made at the end regarding which cup had the ice that melted the fastest.

What's Happening:
Water typically freezes at 32 degrees Fahrenheit.  When table salt (NaCl - sodium chloride) is added to ice, it depresses the melting point; a 10% table salt solution will freeze at 20 degrees Fahrenheit and a 20% table salt solution will freeze at 2 degrees Fahrenheit.   Sodium chloride is an ionic solid which means that in water it will dissolve into two different ions, a positively charge sodium ion and a negatively charged calcium ion.  The ions interfere with the structure of the ice, making it more difficult to freeze.  Similarly, when you add table salt to boiling water it increases the boiling point of water making the pasta cook faster.  Other salts will similarly depress the melting point of ice; sodium chloride will actually only work well to about 15 degrees Fahrenheit whereas other salt (magnesium chloride, calcium chloride) is capable of bringing the freezing point down to a lower level. Interestingly, the sugar will also hasten the melting of the ice because it also interferes with the structure of the ice - it just won't melt it as fast because it lacks the ionic structure of salt.

Extensions:
A great extension to this activity is to make homemade ice cream.  Here's a good link with directions for kids to make them in plastic bags. Kids love this process, but be forewarned to have the kids use mittens or to hold the bags as they get cold enough to cause frostbite!

If you have a thermometer that will measure below 32 degrees Fahrenheit use this to measure the temperature of the different mixtures.  You could also add different types of salt (epsom salt, rock salt, table salt, etc.) and record the different temperatures that each mixture drops to.  Unfortunately, most kitchen thermometers do not go below 32 degrees Fahrenheit, but you may be able to find one at a teaching supply store.  A good place to find some cheap, classroom-style thermometers (and tons of other lab supplies) is American Science & Surplus.  I think their "small, two-way thermometer" is a great choice for kitchen science experiments.  Similarly, for older kids you could alter the experiment by exploring how different substances affect the boiling point of water.

Friday, December 9, 2011

Grow a Crystal Snowflake


Grow your own crystal snowflake ornament overnight!  This activity is fast and simple and a great example of crystal growth and shape.  From our rock collection activity last week, the girls are fascinated by crystals.  (Crystals are sparkly and they are girls - what else can I say?)  Because rocks are combinations of multiple minerals, the crystals are not able to grow in their true form as they would given optimal conditions.  We can create those conditions by creating a solution of borax in water and providing a surface (pipe cleaner) on which the crystals can grow overnight.  This activity results in a crystal snowflake that can be hung in windows or as an ornament.  Please be warned that the resulting crystals do look like rock candy but they SHOULD NOT be tasted! 

Materials Needed (for one snowflake):
  • recycled glass jar - pasta jar works well; the larger the jar the bigger the snowflake
  • boiling water
  • food coloring (optional)
  • stirrer - wooden spoon, etc.
  • pipe cleaner
  • 12" piece of nylon fishing line
  • pencil
  • borax - powdered cleaning agent, found with the laundry detergent at the grocery store

Process and Pics:
Cut pipe cleaner into smaller pieces that will fit inside the mouth of your glass jar.  In nature, snowflakes are always six-sided crystals so you will need three pieces for each snowflake.

Twist the pipe cleaners together at the middle so that you have a six-sided snowflake shape. (Note: you could definitely do this with other shapes - I imagine red hearts would be really cute around Valentine's Day!)
Attach the fishing line to the top of one of the snowflake spokes.  Tie it at the middle in a double knot and then tie another knot at the top.  The resulting loop of fishing line will later serve as the hanger for the snowflake and crystals should not form on the nylon line.  The picture below shows the knots made with green yarn - note this is for visual purposes only - if this one were hung into the solution then crystals would form on the yarn as well as the pipe cleaner.


Boil enough water so that the glass jar is filled to within about an inch from the top.  Take note of how many cups of water this is because the amount of borax added will depend on the quantity of water.  Carefully pour the boiling water into the glass jar - this is an adult job!

If desired, add food coloring to the water in the jar.  We added about 4 drops for Maya's snowflake but the resulting crystals were not that colorful - more of the resulting blue color was from the underlying color of the pipe cleaner so you may need to add more.

Add borax to boiling water one tablespoon at a time, stirring to dissolve after each addition.  Because borax is slightly caustic, it is best if the adult measures out and adds the borax although you can let your child stir if you like.  You will need 3 tablespoons of borax for every cup of water.  After the last tablespoon is added, not all will dissolve - that is okay!


Use the loop to hang the snowflake from a pencil and lay the pencil over the top of the jar, inserting the snowflake into the solution.  It should hang in the middle of the jar.  If it is touching the bottom, you can carefully pull it up and either retie the top knot in the fishing line or use a clothespin to hold it at the correct level.  If it is too high, you can make an S-shape with another pipe cleaner and hang that over the pencil, attaching the snowflake shape to the S-shape to lower it.


Give your child time to draw the set-up in their science journal.  Sydney used my sample snowflake with the green yarn around it to trace around, which was a great idea!

Allow to sit for at least 8 hours or overnight for the crystals to develop. 

Remove the snowflake from the solution.  Rinse very quickly in cold water and place on a folded over paper towel to dry.  Hang and admire your snowflake!


What's Happening?
The borax (sodium borate) that is sold in grocery stores is in a powdered form but actually has a crystalline nature similar to salt and sugar.  Most crystals can be classified as one of seven shapes (or systems).  Given the right conditions, crystals will grow in the form of their distinctive shape.  Below is a picture of the seven basic shapes that crystals will grow into.  A few common examples: borax is monoclinic; sugar is hexaganol and salt (NaCl) is cubic.

In this activity, we we able to make those conditions happen by adding the borax to boiling water.  The hotter the temperature of the water, the greater the amount of borax that is able to be dissolved. The solution becomes "saturated" when it can't dissolve any more of the borax (solute) that you are adding.  For best results, we tried to make a "super saturated" solution - one that contains more of the solute that could be dissolved under the conditions.  (Remember that not all the Borax dissolved after that last tablespoon was added?)  As the solution cools, the water can hold less and less of the borax and the excess borax starts to crystallize out of the solution onto the pipe cleaner. 

Extensions:
Experiment with other types of crystals.  Both table salt and sugar will work, but they do take longer to grow (maybe a week).  Again, create a super saturated solution by adding your mineral to boiling water to the point where no more will dissolve in the water.  Alum, found in the baking good sections of the grocery story (its used in pickling), will also grow good crystals.  Here is a great list compiled by About.com of other crystal growing experiments.  If you do grow more crystals then provide your child with a magnifying glass and a strong light and see if they can identify which of the 7 shapes they represent.

You can also build some models of the seven common crystal shapes.  I developed a crystal structure activity using gumdrops and toothpicks.  This would definitely work better with older kids, but Sydney and Maya both enjoyed building them with some help.  They are learning some of the geometry words, like "square", "cube", and "rhombus" at school, so if nothing else this was a great way to reinforce their understanding of those shapes.  If you want to build the shapes out of paper, Math Forum has a crystal activity where you print the shapes, cut them out, and attach them together with glue.  (And, I couldn't resist adding this: here's a recipe for homemade gumdrops, if you are so inclined!)

Need a Snow Day?And, of course, there a zillion things you can do for further exploration and fun with snowflakes.  I found a couple of really fun ones to share.  This tutorial from Instructables (one of my favorite sites ever) is great for cutting 6-pointed snowflakes out of paper.  Also, Snowdays from Popular Front is a fun virtual snow flake lab where you can design and "cut" your own snowflake, add a message to it, send it through email and share it with the pool of other snowflake designers.

Have fun with the science of crystals and snowflakes!

Thursday, December 1, 2011

Creating a Rock Collection

My girls both love rocks and frequently come home from our outdoor adventures with pockets stuffed full.  Recently, they've taken to destroying, I mean harvesting, rocks from our decaying asphalt driveway.  The top layer of asphalt has come off at some spots and the underlying rock layer is exposed.  (My hubby and I are having issues justifying the expense of repaving...)  Rocks are fascinating to kids and they are a great way to explore some basic geology.  A rock collection is a great way to turn those finds your kids come home with into a learning experience.

Materials Needed:
  • bucket
  • digging tool
  • magnifying glass
  • sorting containers (we used plastic egg and apple cartons we pulled from the recyling bin)
  • desk lamp
  • rock and mineral guide (we used the DK Pocket Guide for Rocks and Minerals as well as a one page sheet (Google Doc) I put together comparing the different types of rocks)

Process and Pictures:

Start off by collecting a variety of rocks.  The girls collected some from around our property but you could find them a variety of places.  Outcroppings or hillsides are better places to find interesting rocks than flat land in general.  (Assuming, of course, that you don't want your child picking apart your driveway.)  Give them a bucket in which to put their finds.  You can also provide them with a magnifying glass to examine their rocks.


Bring the rocks inside and have your child spread them out in front of them.  It is helpful to have both a magnifying class for observing the rocks more closely and also a desk lamp to provide some extra light.  If you have a rocks and minerals guide this would be a great time to share it with your child; they are often fascinated by the beautiful pictures that the guides often contain.  Talk about the properties of the rocks that they can observe.  Some rocks may have visible crystals.  Some may be very monochromatic while others may have many colors present in them.  You may find a rock that has fragments of other rocks in them.  You can also have them observe the rocks using their other senses such as feeling how rough or smooth they are.  
Ask your child to sort the rocks. There are a variety of ways to sort, depending on the inclinations of your child.  One way to sort which works especially well for the youngest child is by color, which is what my younger child wanted to do.  We used a large, apple container for Maya's collection - the impressions were big enough to fit a large number of rocks.  The colors are indicative of the minerals present, which you can tie back to the mineral pictures in the guide if you want.  For younger children, you could also sort it into what they can imagine using the rocks for, similar to the book "If You Find a Rock".  Sort the rocks into groups based on what your child can imagine using them for: skipping, wishing, writing, etc. 

Another way to sort is by the crystals present in the rocks. Sydney is obsessed by the "sparkles" in the rocks - so we talked about what crystals are and how they grow.  (We may have to grow some crystals in the near future she is so fascinated by them...)  Sydney started out by sorting the rocks into those with visible crystals and then from there sorted them by those with similar color and texture.  We used a 2 dozen egg container for Sydney's collection - the impressions were smaller but able to accommodate her collection with a greater number of groups.

For older children, see if you can sort the rocks by type: igneous, sedimentary or metamorphic.   This is not necessarily an easy process as experienced rock hunters and geologists can spend hours debating the characteristics of various rocks, but you may be able to sort them based on some very general ideas related to how they are formed.  (See 'What's Happening' section below for formation information.)

Put your collection into a safe spot so that future finds can be put into the containers. You can also take pictures of the rocks to put into the child's science journal and make labels for the containers.

What's Happening:
Rocks are all around us.  They are a combination of two or more minerals.  (For more information on minerals, see the 'Extensions' section below'.)  They are classified by how they are formed into either igneous, metamorphic or sedimentary rocks.  They are then further identified based on the minerals that are present in the rocks. 

Igneous rocks are formed as molten lava cools and often have interconnected crystals of different minerals.  If the crystals are big, then the rock cooled slowly so they were probably formed inside the early.  If the crystals are small, then the rock cooled quickly on the surface of the earth.  Igneous rocks also may have pores with the gases escaped as the rock cooled.  Metamorphic rock is rock that has been transformed due to heat and pressure.  They are often denser than igneous rock and their crystals may have separated into bands.  Sedimentary rocks are rocks that have been created from fragments of other rocks that have been cemented together.  If you can see small pieces of other rocks or, even better, fossils, then you probably have a sedimentary rock.  The one page sheet I created has some pictures of common rocks for each of the three types, or you can also refer to this rock chart from the United States Geological Survey to learn more.  I also found this on-line rock key that the author has successfully used with elementary age students that you might want to give a try.


Extensions:

We really enjoyed the book, "Let's Go Rock Collecting" by Roma Gans.  It starts out with kids going rock collecting but talks about the types or rocks and even the rock cycle.  A good intro for young scientists out there and Maya even selected it as a bedtime reading book several days in a row.

Another thing to do that would be interesting, especially with older kids, is to see if you can identify the minerals that are present in the rocks.  For this a guide is especially helpful.  Geologists look at the following characteristics to aid in mineral identification:
  • color
  • streak
  • transparency
  • luster
  • hardness
  • cleavage
  • fracture
  • specific gravity
  • crystal form
You can find more information on each of these characteristics on the "Rocks for Kids" website.  
Maya testing the streak of one of her rocks.
 

Saturday, November 19, 2011

If You Find a Rock

 
We're a bit delayed on our science activity this week.  Cranky kids, sick dog, not enough sleep, grumpy momma - did I just type that?  Well, it's true.

We actually did do an activity on rock collecting, which I'll write up soon, but in the meantime wanted to share a wonderful book that has inspired us this week, called "If You Find a Rock".  It is a beautifully written and photographed book about all the wonderful things a rock can be.

My family loves rocks; both girls are little rock hounds.  After an afternoon outside, I have to be careful to check their pockets lest their findings wreak havoc on my washing machine.  They take after my mom, their dear Neeni, who also collects what the author would classify as "memory" rocks from special trips.  What other types of rocks are there?  Here's a small excerpt from the book:
"... Or you might  find a rock
whose water-smoothed surface
catches your eye.
If it feels easy in your hand
when you rub it,
then you found a worry rock.
You rub it between
your fingers
and your troubles
are smoothed away."
I love the connections between poetry, art and science!  Do you have any books like this that make your heart and brain sing?

Monday, November 14, 2011

Natural Wood Building Blocks


I thought I'd start this post with a public service announcement:

No trees were harmed in the making of these blocks.

No, no, that wasn't it.

I am, by no possible scope of the definition, a woodworker.  

And, I'm not so sure this was such a great project for an almost 6 mos pregnant lady like myself - too many contortions required by my less-than-mobile body!

Now that that's out of the way... I'd seen some cool, natural wood blocks in a catalog awhile back and loved them, but thought they were a little pricey.  Then, my friend had a black walnut tree taken down on her property and said she had some fairly good-sized branches left and my mind started ticking.  So, I decided to make these to enter into an auction for our local chapter of Wild Ones, a native plant organization that I am involved with. 

There are several other blogs that talk about how to make blocks like these, including "Life on Willowdale" and "Home in the Country".  They both left the bark on, but for these I decided to try to remove the bark partly because it was fairly covered with lichens and also because of the nature of black walnut wood - it has really cool striations of the darker heartwood and lighter sapwood that I hoped would show better with the bark off.  (And, let's face it, because I like to make things harder on myself than necessary.)  There is also a Google Doc from the State of Minnesota DNR and Project Learning Tree that has some useful information in it. 

Here is roughly the process we followed:
1.  Collect the wood.  We started with several branches, each about 6' long and ranging from about 2 1/2" at the base to 1" thick at the tip.

2.  Remove the bark (if desired).  I used a 1" chisel to do this.  (I actually wasn't that successful in this - although it still ended up looking pretty neat - on a lot of the pieces the very innermost layer of bark remained.  For more information on the tissues in a tree branch, check out this site.)  If you remove the bark, then you should sand the branch smooth before you go onto the cutting step.  Start with course sandpaper and then work your way to fine.  (I used 60, 100, and then 150.) 
Branch with bark (mostly) stripped.
Branch after sanding.

3.  Cut the branch into your blocks.  Try to vary the cuts so that you get a variety of different lengths and widths for your blocks. I used a compound mitre saw, but you could definitely use a hand saw.  Sand the cut edges so that no rough spots remain.  I used a coarse and then a fine sandpaper. 

4.  Dry the blocks in an oven set at a very low temperature (200 degrees or lower) for a period of 2 to 5 hours.  To do this, place a wire cooling rack on top of a metal cookie sheet, then add a piece of parchment paper to the top.  Put the blocks on this set-up and periodically rotate the blocks.  Because I'm a geek, I also weighed a couple of the blocks every half-hour - they lost about 10% of their mass by about the 2 1/2 hour point and then stayed pretty consistent for the next hour so I turned off the oven then.  It will be interesting to see if they crack over time, though.
Our drying set-up.

5.  Re-sand the blocks, if necessary.  I noticed that the drying out process seemed to roughen my edges a bit so I did a quick sanding job.

6.  Coat with a protective layer.  I used a jojoba oil/beeswax mixture that I bought a while ago from Jupiter's Child on Etsy.  (I also bought an adorable carved wooden squirrel for our nature table - they have some really cute things!)  I think you can make your own using olive oil and beeswax (or jojoba oil, which smells amazing, if you can find it).  Rub the wax/oil mixture onto all the surfaces of the block.  (An aside: Rub the mixture into your hands.  Ah!)  Let sit for at least an hour then buff off with a smooth cloth. 
Blocks coated with the oil/beeswax mixture.

7.  Play with your Natural Wood Building Blocks!

A Few Thoughts: 
  • Start with a branch that is at least 2" thick at its base; 2 1/2" to 4" would be even better.  If you do decide to strip off the bark, then you will lose some thickness there and it is nice to have a diversity of sizes in your blocks.  (Mine were a little too uniform.)
  • While I like the look without the bark, bark removal is not an easy process and added at least a couple of hours to the process, between de-barking and sanding.  If you do decided to remove the bark, realize that some types of trees are much easier than others to remove their bark.  Also, I've heard that it is easier to remove bark in the spring when the sap is running.
  • Obviously, the sawing part of this process is not appropriate for young children.  I used a small hand sander for most of my sanding (a Dremel would probably have worked even better!  Can we say Christmas List?) but if you do the sanding by hand then kids could help there.  They also would be great coating the small pieces with the wax/oil mixture.  Sydney helped me carry stuff out to the barn but, luckily, she is terrified rather than intrigued by the loud saw I used, so she vacated shortly thereafter.
  • Air-drying is really probably the way to go, but it requires a lot of patience.  My understanding is that it takes about 1 year/1 inch of thickness of wood, depending on the warmth and humidity levels of where you store the wood.  I have several branches left that I'm going to treat with Anchorseal, a waxy product that I picked up at our local WoodCraft store, and try to make another set of blocks next fall.
If you end up doing this project, please let me know how it turns out and, as always, if you have any ways to improve it!  (As I said, I'm not a woodworker!)  You can also add any pictures to a new Flickr group I just created, Activities with Momma Owl's Lab.

Have fun!


Thursday, November 10, 2011

Smarties Science

This activity is another use of your Halloween candy stash.  It is adapted from an activity on CandyExperiments.com - which is a very fun site you should definitely check out for more ideas of what to do with your leftover candy.  

Many types of candy has an acid as one of its major ingredients (the origin of the sour flavor) and it will react with baking soda to form bubbles of carbon dioxide.  Since we've been talking lately at the dinner table about the importance of chewing your food rather than swallowing it whole, this activity also looks at the impact of surface area on the reaction that is created.

Materials:
  • a couple of rolls of Smarties candy (the sour sugar candy not the chocolate wafers)
  • water (and a pitcher if you are adventurous and want to let your child practice pouring)
  • 2 clear cups
  • spoon
  • baking soda
  • 1 teaspoon
  • wooden or rubber mallet
  • sandwich-size plastic bags

You could do this with only one roll, but its nice to have an extra so you can use the same color Smarty (singular of Smarties?) for the different parts of the experiment.  Controlling variables and all.  Other sour-tasting candies (like SweeTarts) can be substituted here, although for the second part of the experiment it really should be able to be crumbled or smashed.  (I'm partial to Smarties, anyway.  I used to eat them, and Nerds, before tests in high school to ostensibly give me some brain-boosting power.  I know, I know - what a geek!)

Process and Pictures:
Part I: The Importance of Baking Soda
Start off by showing your child the Smarties candy and telling them that you are going to add the candy to some different liquids to see what happens to it.  

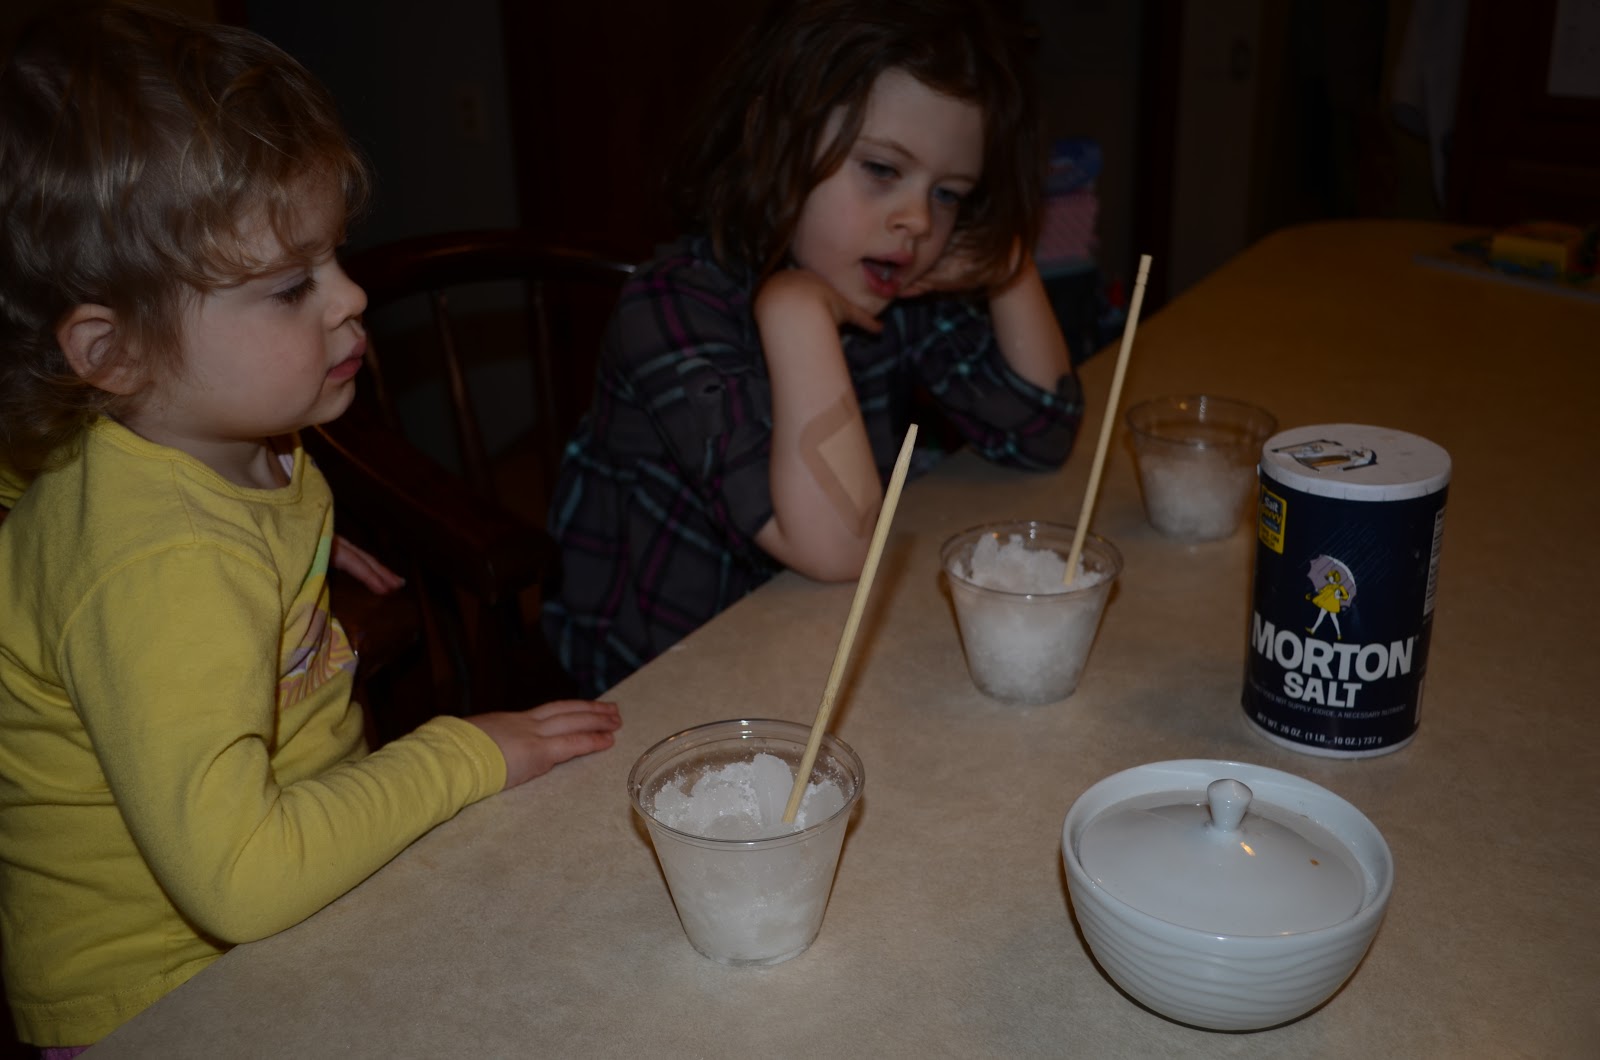
Have them pour about 1/2 cup of water into each of the two cups.  (You can label the cups and draw a line on them to help, which I did although you can't really see it from the picture to the right.)

Then, measure 1 teaspoon of baking soda and add that to one of the cups.  Have your child stir the baking soda into the water and then let it settle for a bit.  (This part is important because when you first add the baking soda, the solution is pretty cloudy and you want it to clear up so that you can see the bubbles better.)

Give your child two Smarties (preferably the same color) and have them drop the Smarties into the cups at the same time.  We did a count-down and its not really that important that they go at the exact same time, just as long as its pretty close.

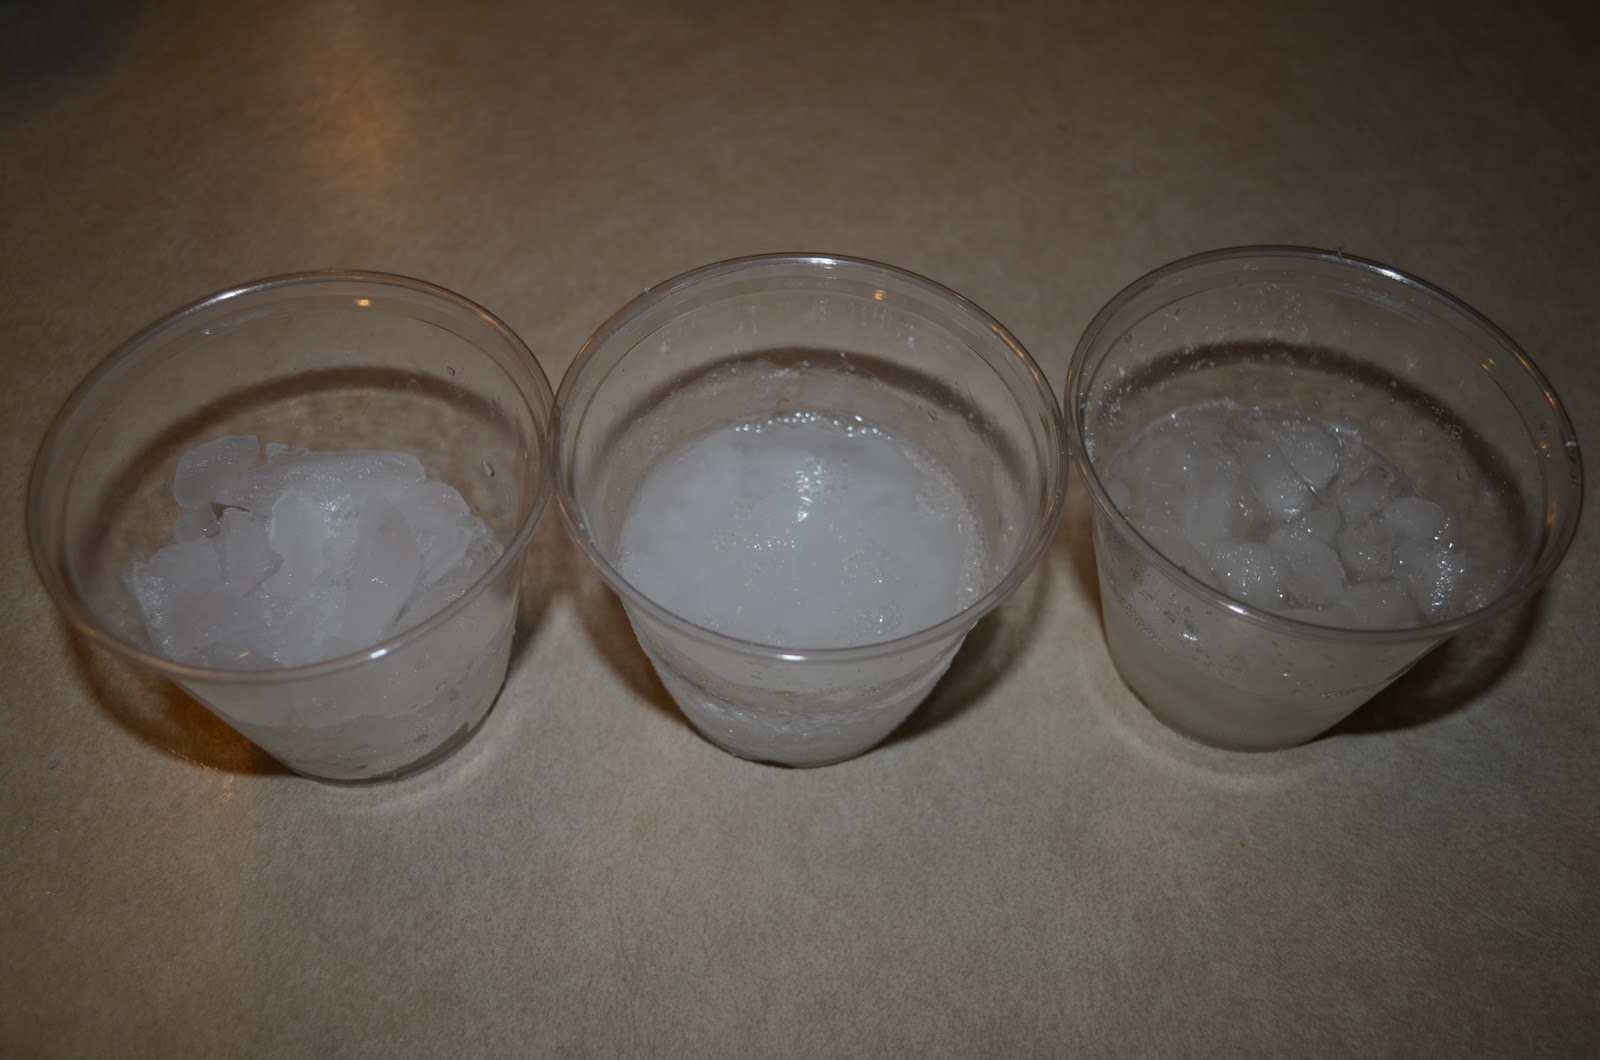
Observe what happens in each of the cups.  They should be able to see the bubbles coming off the candy that is in the baking soda solution.  If you lift the cup to their ear they should be able to hear it as well.  This might be a good time to review the five senses with them (touch, taste, smell, hearing, and sight) - and also remind them not to taste this experiment.  (In small amounts it wouldn't hurt them at all, but I don't think it would taste especially good.)

If you are using a science journal or something similar, have them record their observations in it before moving on.  Discard the solution and rinse out the cups because they are going to be used again in the next step. 

Part II: Smashed v. Whole Smarties
Now that you've established that Smarties react with a baking soda solution to form bubbles of carbon dioxide, we are going to experiment with how the size of the Smarties affects the reaction. 

Again, add about 1/2 cup of water to each of the cups.  Then, add 1 teaspoon of baking soda to each of the cups and have them stir it in.  Let the solution settle for a bit so that it clears up.

For this part of the experiment, each child needs 4 Smarties.  Put two of the Smarties aside and then take the other two and place them in a sandwich-size plastic baggie.  (Make sure the top is well secured!)  Let them pound the candies into very small pieces. 

At this point, pause and ask your child to predict which type of Smarties, the smashed one or the whole one, they think will make more bubbles when it is added to the baking soda water. 

You are going to add the Smarties to the two cups of baking soda water simultaneously, or as close as you can get it.  We found that it was a little tough to get the Smarties powder out of the plastic bag as it kept getting stuck in the zipper at the top.  Instead, we snipped a hole in one of the bottom corners and I poured it out of the hole into one of the cups while the girls dropped the whole Smarties into the other cup.

Observe the reactions that occur in the two cups.  They should be able to see a great deal more bubbles in the cup with the smashed up Smarties.  Again, lift up the cup to their ear and have them listen to the difference in the bubbles - I think its much more extreme than just looking at it. 

Revisit their prediction about whether the whole or smashed up Smarties would make the greater number of bubbles.  If you are using some sort of science journal, give them time to record their thoughts and observations.  Sydney's journal is pictured to the right and, as you can see, its a combination of her drawing and both of our lettering.  I try to have her write a summary sentence after each activity (which you can kind of see at the bottom) but I help her with some of the other writing.  Also, as a note, I didn't think Maya, who is 3, was getting anything out of the journal process, but she opened to the graph that we did last week and she said, "Look, Momma, that's from our M&Ms", so maybe she is getting more out of it than I thought!

What's Happening:
Smarties candy contains an acid known as citric acid (the same one that is in citrus fruits) that is responsible for its sour taste.  Citric acid will react with the baking soda (sodium bicarbonate) solution to form bubbles of carbon dioxide.  Sodium bicarbonate is actually a weak base and it breaks apart in water; it is then free to react with the citric acid and forms not only carbon dioxide but also sodium citrate and water, although these aren't as readily apparent in our experiment.

This activity also examines the affect of surface area on the rate of a chemical reaction.  As predicted by my girls, the smaller pieces/greater surface area had a much faster reaction rate/greater bubbles than the whole pieces of Smarties.  I tied this idea into why its important to chew your food when you eat rather than just swallowing it whole.  When you chew your food well, then the smaller pieces make it easier for your stomach to break it down the rest of the way so that you can get energy out of the food. 

Extensions:
You could use this basic technique as an acid test and drop a variety of candy types into the baking soda solution to determine whether or not they have acid in them.  A great way to use up a huge quantity of candy in a short amount of time!

Another thing you could do is use it to experiment with other things that might affect the reaction rate, i.e. temperature or quantity of solution.  Fill one cup with hot water and one cup with cold water and drop a whole Smarties candy into each one and see if you can discern any difference in the reaction rates.  Or, fill one cup with a tiny amount of solution and fill the other to the brim and make the same observations.

For older kids, the reaction of sodium chloride and water is actually an endothermic reaction, meaning that it absorbs energy from its surroundings thereby making the solution itself cooler.  Use a thermometer to see if you can measure the decrease in temperature that occurs when you mix the two substances together.  You may need to use an insulated cup and play a bit with quantities to get a discernible difference (depending on the sensitivity of your thermometer) but, hey, that's part of the fun!

Wednesday, November 9, 2011

Candy Creatures

I had to get the rest of the Halloween candy out of my house.  Seriously.  I'd consolidated it and put it on top of the refrigerator but it was still calling to me - and the girls.  (Somehow, I came upstairs last weekend twice to find the bucket down on the counter with wrappers around it, but no evidence as to how the girls got it down.)  So, this is what we decided to do:
My favorite was the "Weight-Lifting Almond Joy Man" (top right).  Syd liked the "Graduation Dog" (bottom right).  Maya liked them all.  =)
The process was pretty easy.  Unwrap your candy and dump it in a bowl. 

Provide toothpicks to help stick the pieces together and let them make whatever creature they can come up with. 

Of course, they wanted to eat it, but my compromise was that they got to pick one that they could share after dinner.  The rest went in the trash. 

Candy that worked really well - Dots, Starburst, Reese's Peanut Butter Cups (can't believe we had any of those left), Almond Joy (what kid likes Almond Joy anyway?)
Candy that didn't work so well - solid milk chocolate (i.e. Hershey's), candy corn (I was surprised by this), any of the "airy" candy (i.e. Kit Kat, Crunch, etc.)

This may become a new Halloween tradition - I'm just not going to let the candy taunt me for a week before we break out the Candy Creature activity again.  Post-Halloween Day 3?